
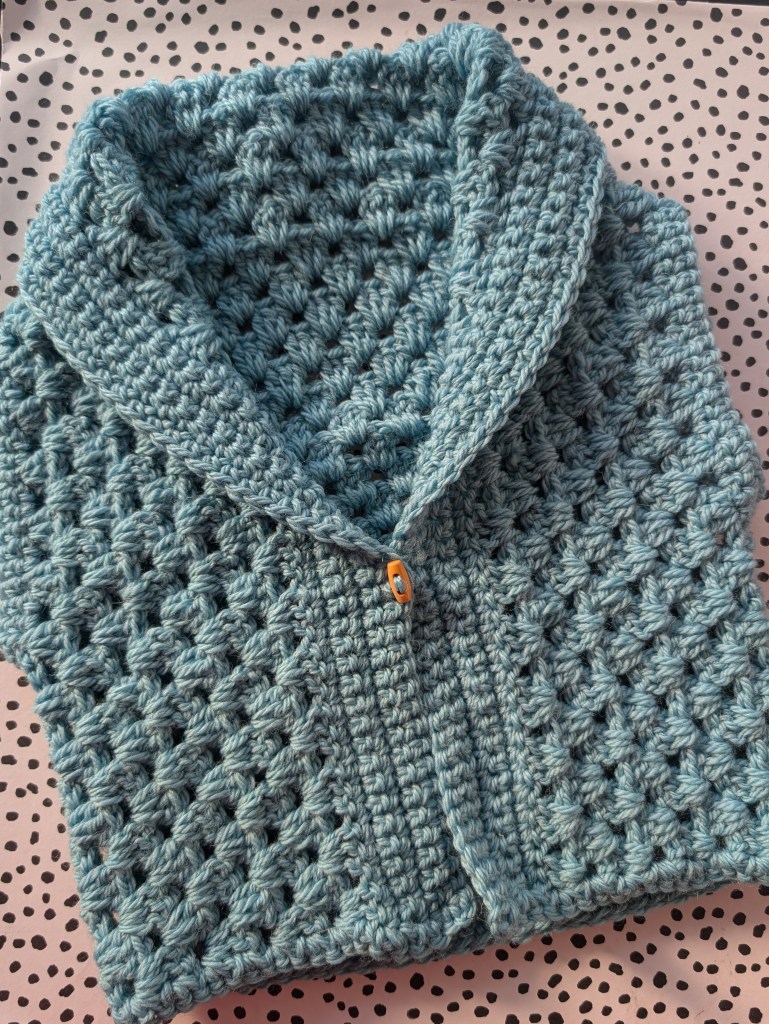
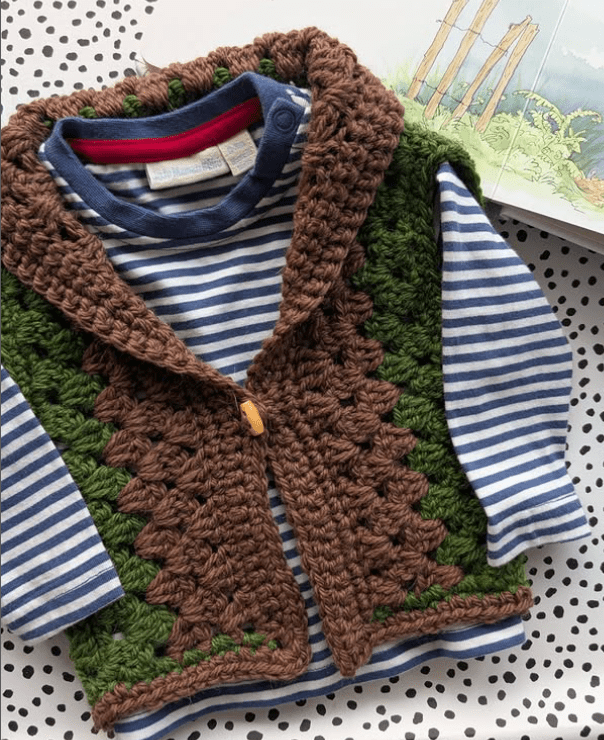
I have been making these gorgeous little crochet body warmers for babies/toddlers all week as my hands have been sore and they have brought me so much happiness.
So enjoyable and easy to make when you feel like a break from bigger crochet projects.
They are named “Bessie” as they remind me of a strong willed little girl who rolls her sleeves up and gets the job done.
The kind of chunky cuddly little girl who is feisty and cares about all the best things in life that matter.
If you know me then you will have guessed by now they are named after a Liverpool lady I admire so much called Bessie Braddock. We have a statue of her in the main train station in Liverpool and I smile every time I walk past it.
Fancy making one?
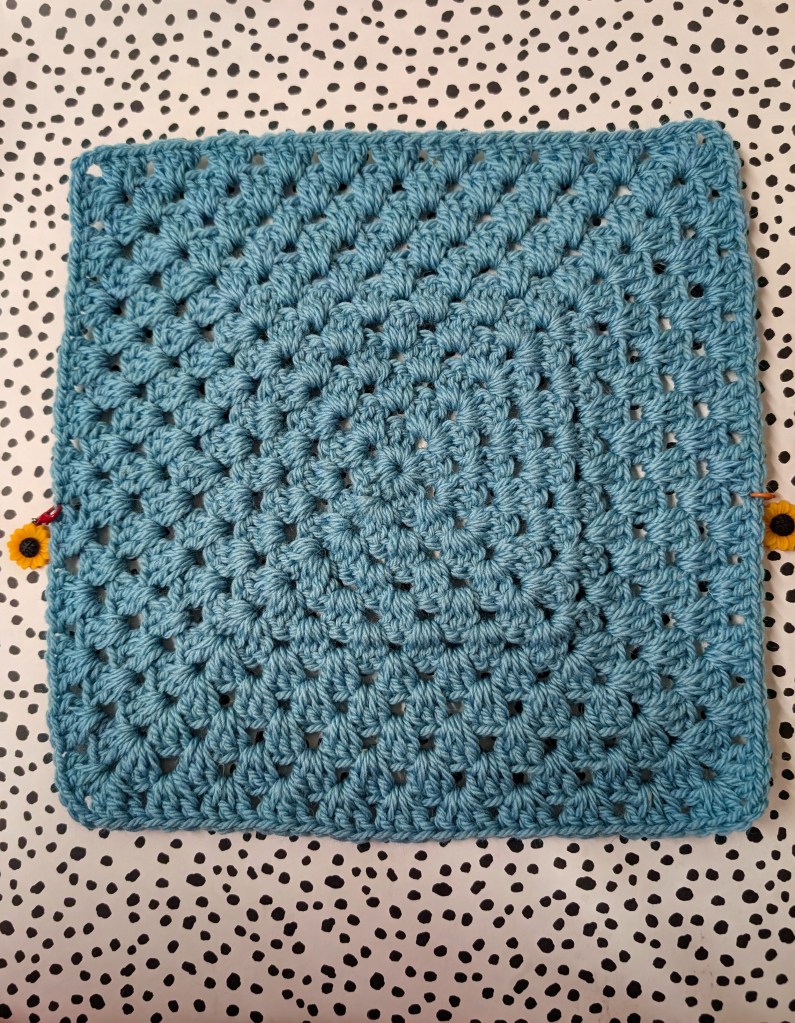
1. Determine the Size
Measure the back of a well-fitting T-shirt from armpit to armpit. This measurement will be the size of the granny square you need to make.
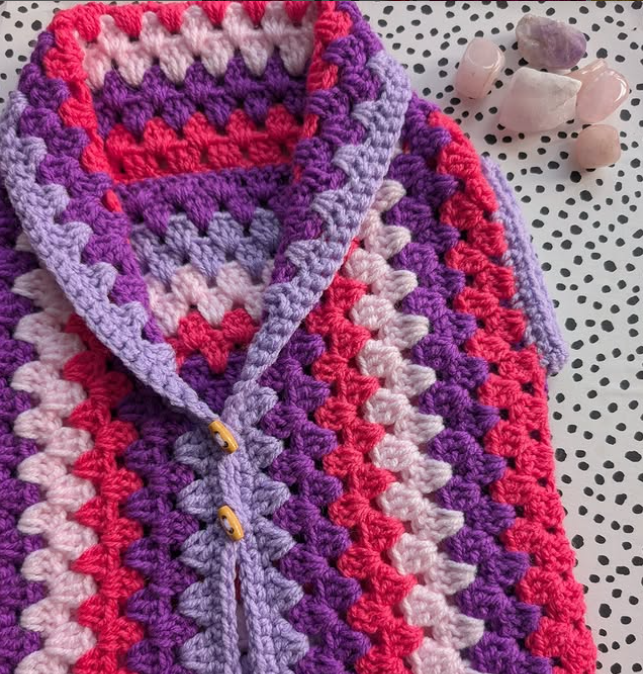
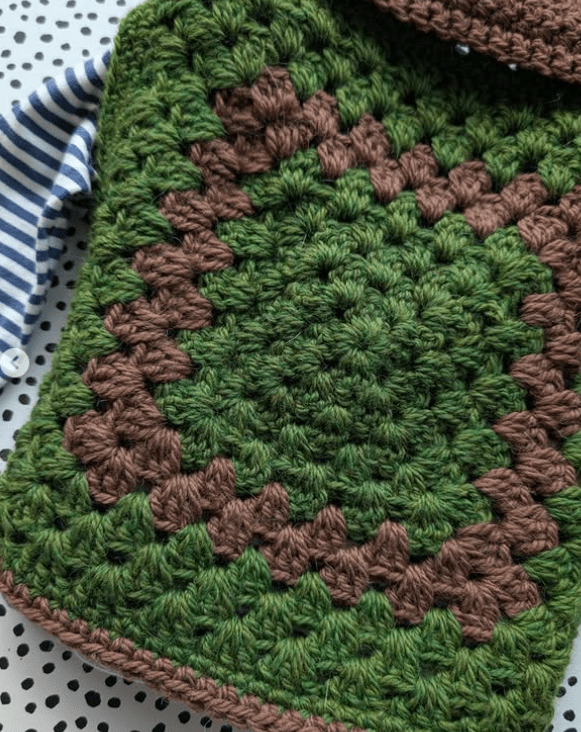
You can use a single colour for a modern look or mix different colours for a traditional style.
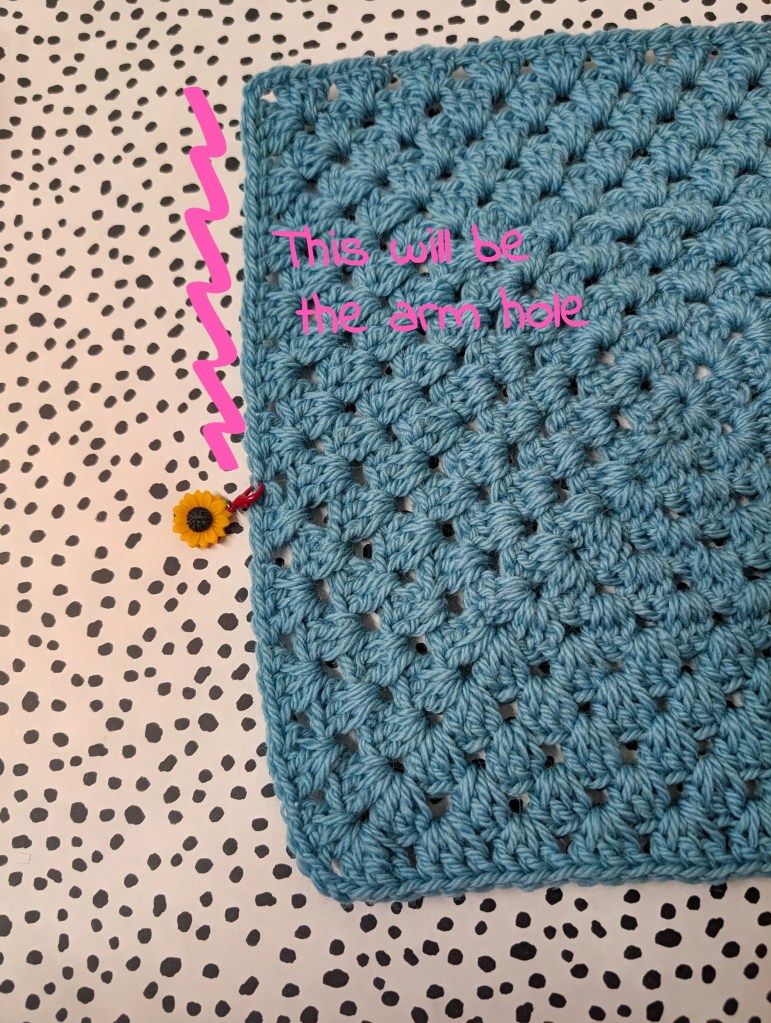
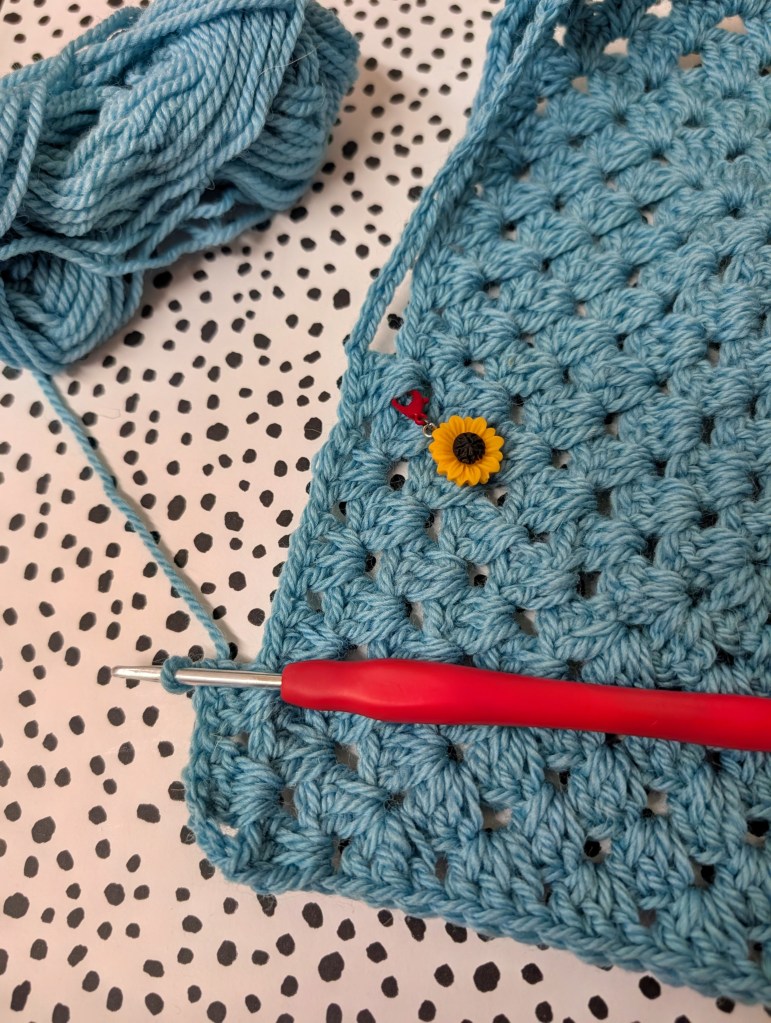
2. Marking the Armholes
Once your granny square reaches the desired size, lay it flat.
Find the halfway point on each side and place stitch markers to create armholes.
If unsure, make the armhole bigger by placing the markers lower.
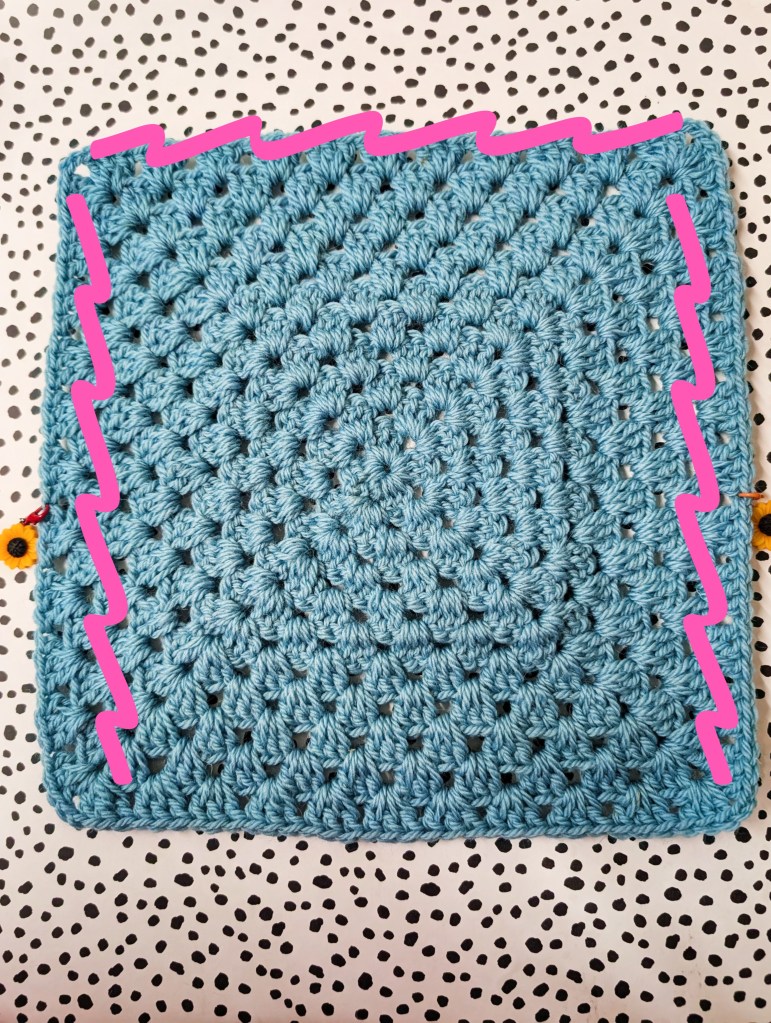
3. Starting the Edging
Attach your yarn at the bottom corner. You will be crocheting around three side of the granny now, not four.
Crochet clusters of three stitches in each space until you reach the stitch marker.
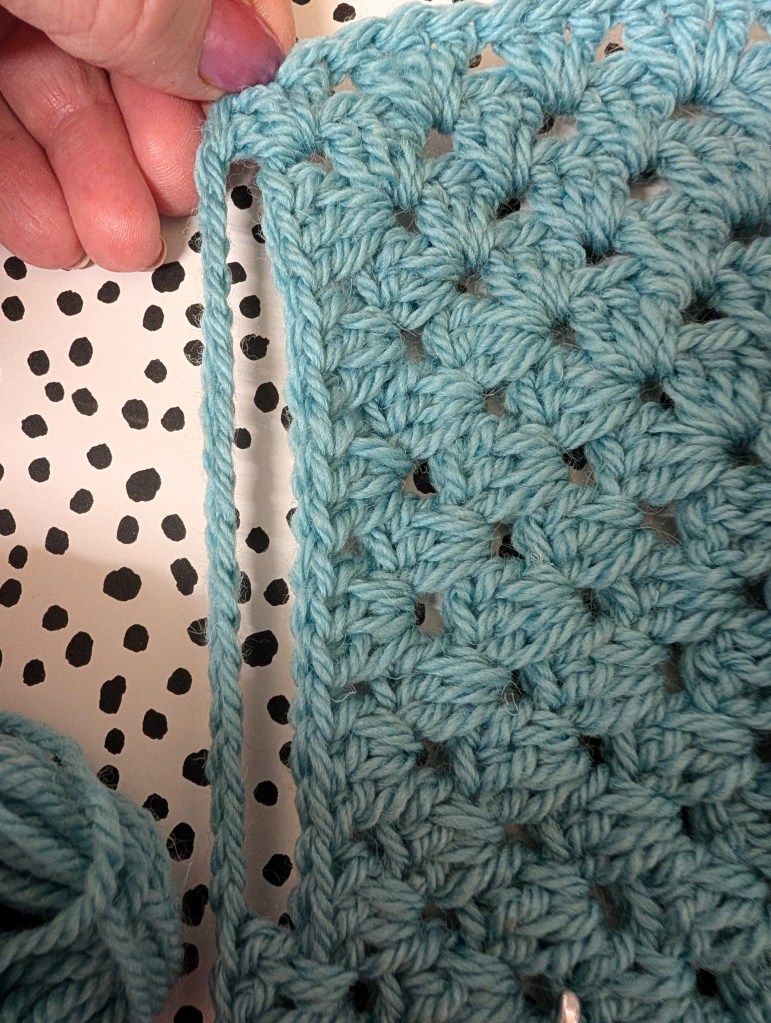
4. Creating the Armhole Chain
Count the number of clusters from the top corner to the stitch marker.
Multiply that number by 3 (since each cluster has three stitches).
Add 2 extra stitches for the corner.
Example: If you have 6 clusters above the marker, that’s stitches + 2, so chain 20 stitches.
5. Continuing the Row
Crochet clusters along the top edge to the opposite corner.
Chain the same number of stitches for the second armhole.
Join at the stitch marker and crochet clusters down to the bottom corner.
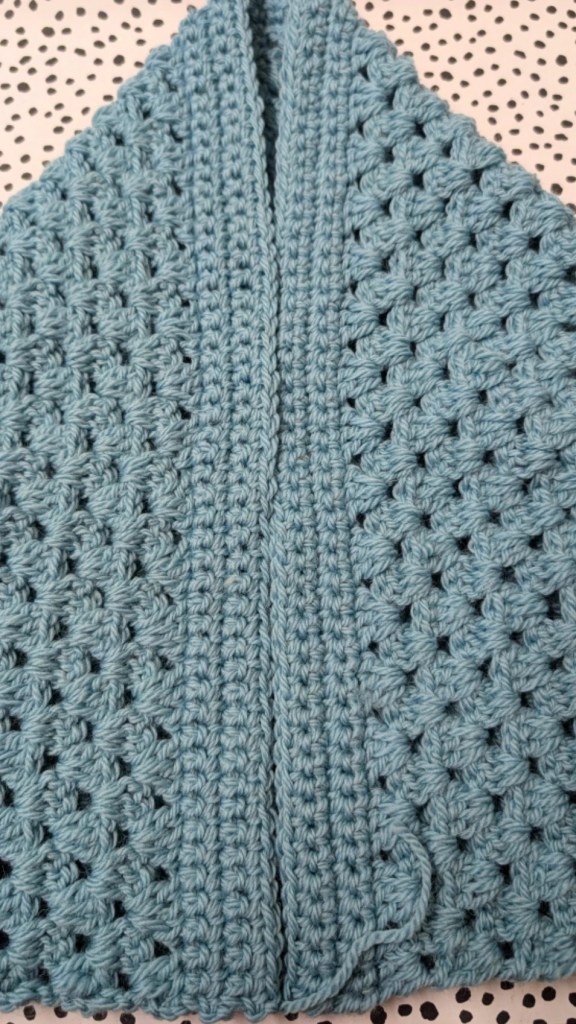
6. Building the Next Rows
Start a new row, working clusters into the chain stitches of the armholes.
Continue working around three sides only, shaping the piece as you go. It will begin to take form.
Keep crocheting until the edges meet in the middle.

6. Adding the Border
Now, it’s time for the border!
Use your favourite stitch pattern to add rows of edging, creating a polished look.
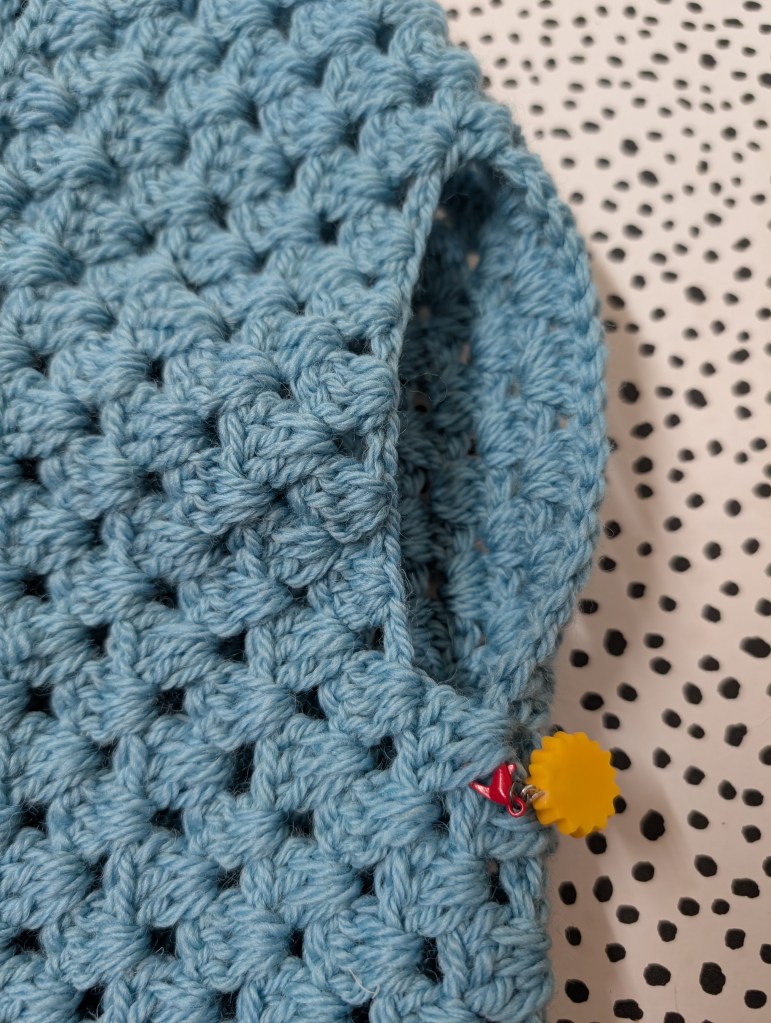
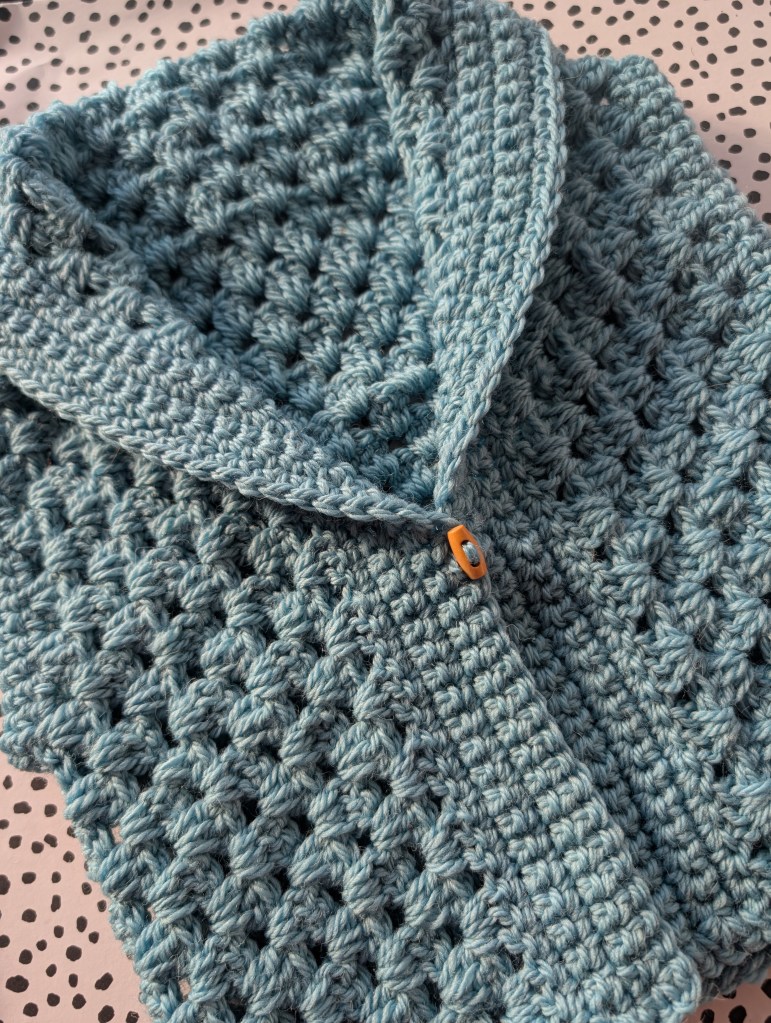
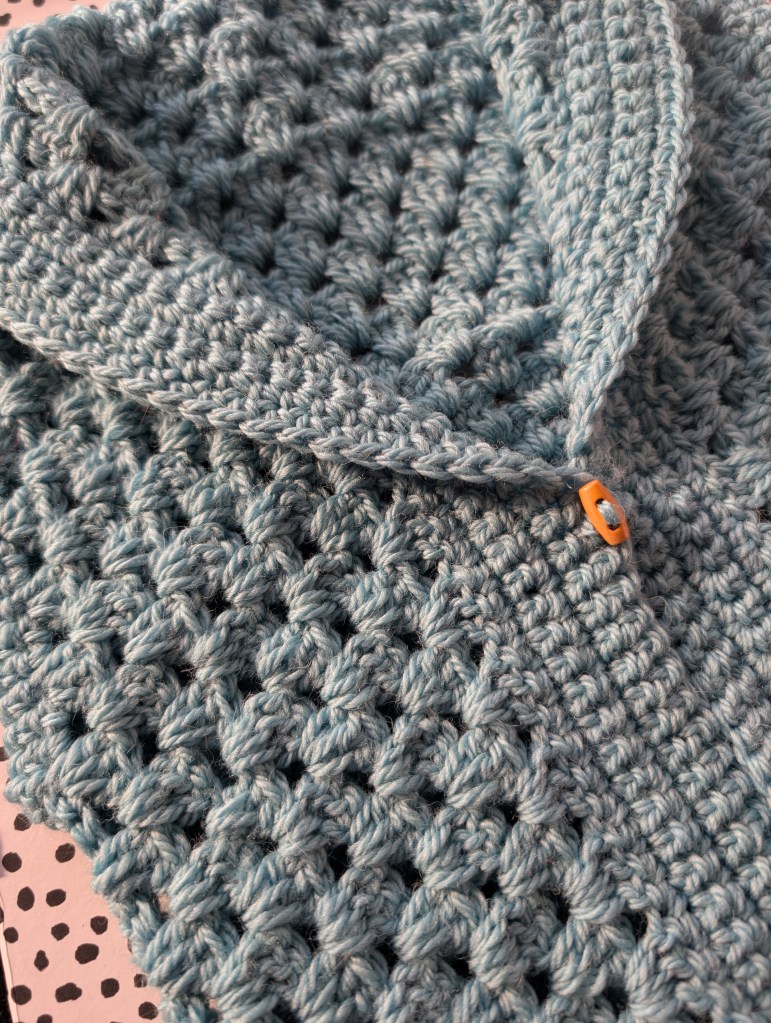
Once the border is complete, fold the top over to form a collar.


For the sleeves, crochet a simple border around the armholes.
A row or two of double crochet works well to neaten the edges.

For the bottom edge, you have two options:
- Leave it as is for a natural finish.
- Extend the border all the way down for a more cohesive look, as shown in the example.

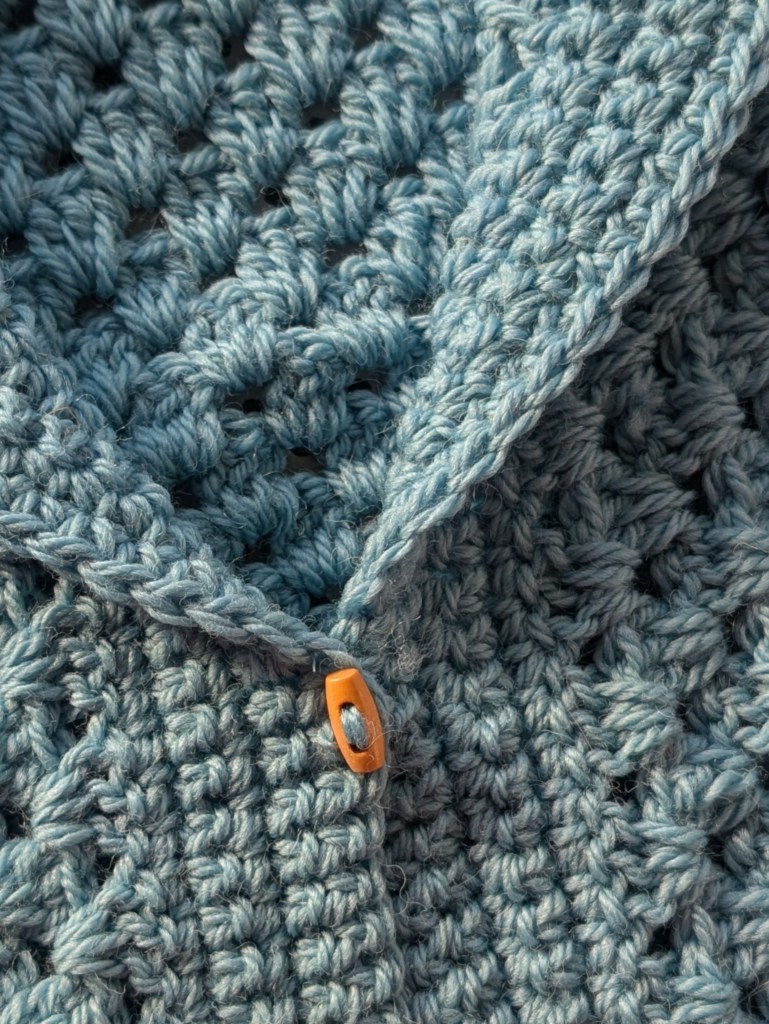
7. Finishing touches
To complete the look, sew on a toggle button or closure of your choice.
And that’s it, your cosy, handmade granny Bessie crochet body warmer is ready to wear!
How Adorable is the Finished Look?
The completed Bessie is truly a labour of love, simple, easy, and oh-so-cosy!
I’d love to see if you make one. I’ve created these in all sizes, from new-born to cuddly me-size, and they never fail to bring joy.


Here are some more I have made:


As you can probably tell, I’m not a traditional crochet pattern designer. My approach, using clear images and easy-to-follow instructions works best for me as it helps inclusivity. I love sharing this way because it makes crochet accessible to everyone.
Happy crocheting, and may your hooks always be busy!
Love & hugs


Leave a comment